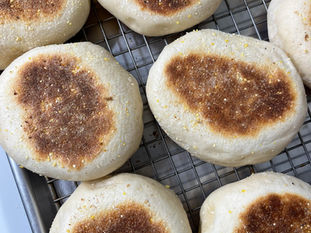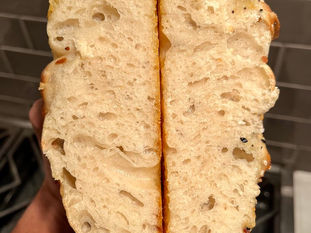
Sourdough may seem like a tall task, but my goal here is to simplify the process as easily as possible so anyone can have confidence to make it, even on their first try!
My mom and I created our sourdough starter (the starter’s name is Babs) in April 2020 at her home in Ocean City, NJ. In June 2020, I went back to my home in San Diego, CA with a bit of Babs (now Babet) and have been baking sourdough with her since then.
Now before continuing onto the recipe below, you must have an active sourdough starter (see my sourdough starter recipe and how to keep it alive). If you do have an active sourdough starter, continue to the below recipe!
I’ve read a lot of sourdough recipes that have gone on for ages, but I want to make this as simple as possible. There are 7 high level steps to remember when making sourdough. Under each step I will give a brief description as to why they are necessary -
Feed your starter
Autolyse/ Mix
Bulk Fermentation
Divide & Pre-Shape
Shape
Proof
Bake
Total Ingredients
An active sourdough starter
Flour, I use either King Arthur or Bob’s Red Mill, but use whatever you have on hand. You will need a combination of a few different kinds - bread, all-purpose, and whole wheat.
Water (filtered, if possible)
Salt (preferably Diamond Crystal)
Recommended Equipment
Dutch Oven
1-2 large mixing bowls
Scale (all my measurements are in grams so this is a must have!)
Rubber spatula
Parchment Paper
Food thermometer
*Optional - Stand Mixer
The following process is only if you are mixing the dough by hand. If you have a stand mixer, continue down further below to follow that process.
Mixing by Hand Step by Step
Feed Your Starter
This is the primary build responsible for making the dough rise. It is a replacement for yeast. I would recommend feeding your sourdough starter in the morning (8-9am) so it’s nice and active for the mix by 1-3pm.
Autolyse
This step is mainly to let the flour and water get to know each other (aka. Homogenize)
Ingredients
775g King Arthur Bread Flour
165g King Arthur Whole Wheat Flour
670g water (95-100°F or 35-37.7°C)
Steps: Mix the flour and the water in a big bowl until all dry bits are hydrated. Cover with a warm, wet kitchen towel or plastic wrap and store in the microwave (or a similar warm place) for 45 min - 1 hour.
Mix
Ingredients
18g fine kosher salt
150g active sourdough starter
Steps: Once your sourdough starter is ready and the Autolyse has sat for 45 min – 1 hour, add the salt and starter. To incorporate together, I utilize Ken Forkish’s “Flour, Water, Salt, Yeast” pincer method. To do this, squeeze and “cut” the dough with your fingers into ~5-6 different sections, then fold them on top of each other to re-incorporate. Do this for 5-10 minutes or until it feels and looks like the salt and starter are fully mixed in. If the dough starts sticking to your hands, wet your hands with warm water and continue.
The following process is only if you are mixing the dough using a stand mixer. If you do not have a stand mixer, go back to the top of the page and follow that process.
Stand Mixer Step by Step
Feed Your Starter
This is the primary build responsible for making the dough rise. It is a replacement for yeast. I would recommend feeding your sourdough starter in the morning (8-9am) so it’s nice and active for the mix by 1-3pm.
Mix
Ingredients
775g King Arthur Bread Flour
165g King Arthur Whole Wheat Flour
670g water (95-100°F or 35-37.7°C)
18g fine kosher salt
150g active sourdough starter
Steps:
Add your water to the stand mixer bowl along with your active sourdough starter. Stir to combine.
Add flour
Hook up the stand mixer bowl and turn on a low speed. Add your salt to incorporate while mixing.
If you want to add other ingredients, now is the time to do so!
Continue mixing for 4-6 minutes and then increase speed one notch for another 2-3 minutes.
The following process is FOR BOTH HAND MIXING AND STAND MIXING
At this point you can transfer to a well-oiled bowl for bulk fermentation if you’d like or keep it in the same bowl and cover with a warm kitchen towel (recommended for easy on/off for bulk fermentation).
I like to keep a notebook to track my steps, times, ingredients, results, etc.
Bulk Fermentation – 4 hours in total
This is the first rise! This step is mainly to increase extensibility (ability to make the dough stretch without tearing), which in turn allows the dough to expand and fill with gases, resulting in a light & airy loaf. The fermentation provides flavor to the dough in the form of alcohols and acids and leavens the bread through gases.
Steps: Stretches and folds are done through the following schedule –
Within the first half hour, every 15 minutes, perform one round of stretches and folds (two total).
Then for the next hour, every 30 minutes, perform one round of stretches and folds (another two). In total, you will do four total rounds in the first 1.5 hours.
Wet your hands with water to prevent sticking and work your way through the North, South, East, and West sides by doing the following:
Stretch the dough high enough so that it can fold completely over the other side of the dough. Rotate 90° and repeat until all four sides have been folded over. That is ONE round.
Once your four rounds are complete, let the dough rest for an additional two and a half hours. During this time, the dough will aerate and rise. The dough should rise anywhere from 30% to 50%. There should be bubbles on the top, sides, and edge of the dough.
Divide and Pre-shape
Steps: On a floured surface, dump out the dough. Flour the top of the dough and divide into two halves. Without picking the dough up or kneading it, form them into round circles. Let the dough rest for 25-30 minutes, uncovered.
Shape
Steps: Fold the outsides of the dough into the middle and gently roll the dough into itself, making a tight circle. Place each loaf in either:
A proofing basket heavily dusted with flour (rice flour highly recommended)
A towel-lined kitchen bowl that has been dusted with flour (rice flour highly recommended)
Rest & Proof
Steps: Cover the dough with either plastic wrap or plastic bags sealed shut with a rubber band (rubber band is optional). Let the dough rest once again for 20 minutes, then place in the refrigerator for 12-13 hours. I found that longer, i.e. 15-16 hours, tends to over-proof the dough.
During this time overall fermentation will slow, but good bacteria activity will continue, adding flavor and a deeper crust color.
BAKE
Steps:
Preheat a Dutch oven inside the oven for 45 min - 1 hour at 450°F (232°C).
Once the preheating is done, take one of the loaves out of the fridge and unwrap. Cut a piece* of parchment paper so it fits over the top of the basket (or bowl) and place a sheet pan or pizza stone on top of that. Flip the whole thing over and remove the basket.
Another option, if you are careful, is to put the parchment paper in the Dutch oven and flip the dough directly into it. Careful not to burn yourself!
Sprinkle the dough with flour and score the loaves however you would like, just make sure the cut is between half an inch and an inch deep. If it isn’t you may not get the proper amount of rise.
Using oven mitts, carefully pick up the parchment paper with the dough on it and place it in the Dutch oven (removing the Dutch oven from the oven first!!!). To create steam, I use a spray bottle and give the dough ~10-15 sprays on all sides. Steam creates rise and cools down the outside of the dough, so it doesn’t overcook before the inside. Cover and bake for 25 minutes.
After 25 minutes, remove the lid from the Dutch oven and bake for an additional 10-15 minutes or until the internal temperature of the dough reaches 208°F (98°C). Remove from Dutch oven**.
*If the bottom of the loaf is too burnt, add a second layer of parchment to the next loaf!
**Wait at least ONE hour before slicing to ensure interior is set
BUON APPETITO


